
Learn
We have put together some helpful guides to bring out the inner Barista in us all!
Check out our step by step methods using some of the most popular brewing equipment, and discover more about how we like to store our coffee and the best way to recycle!
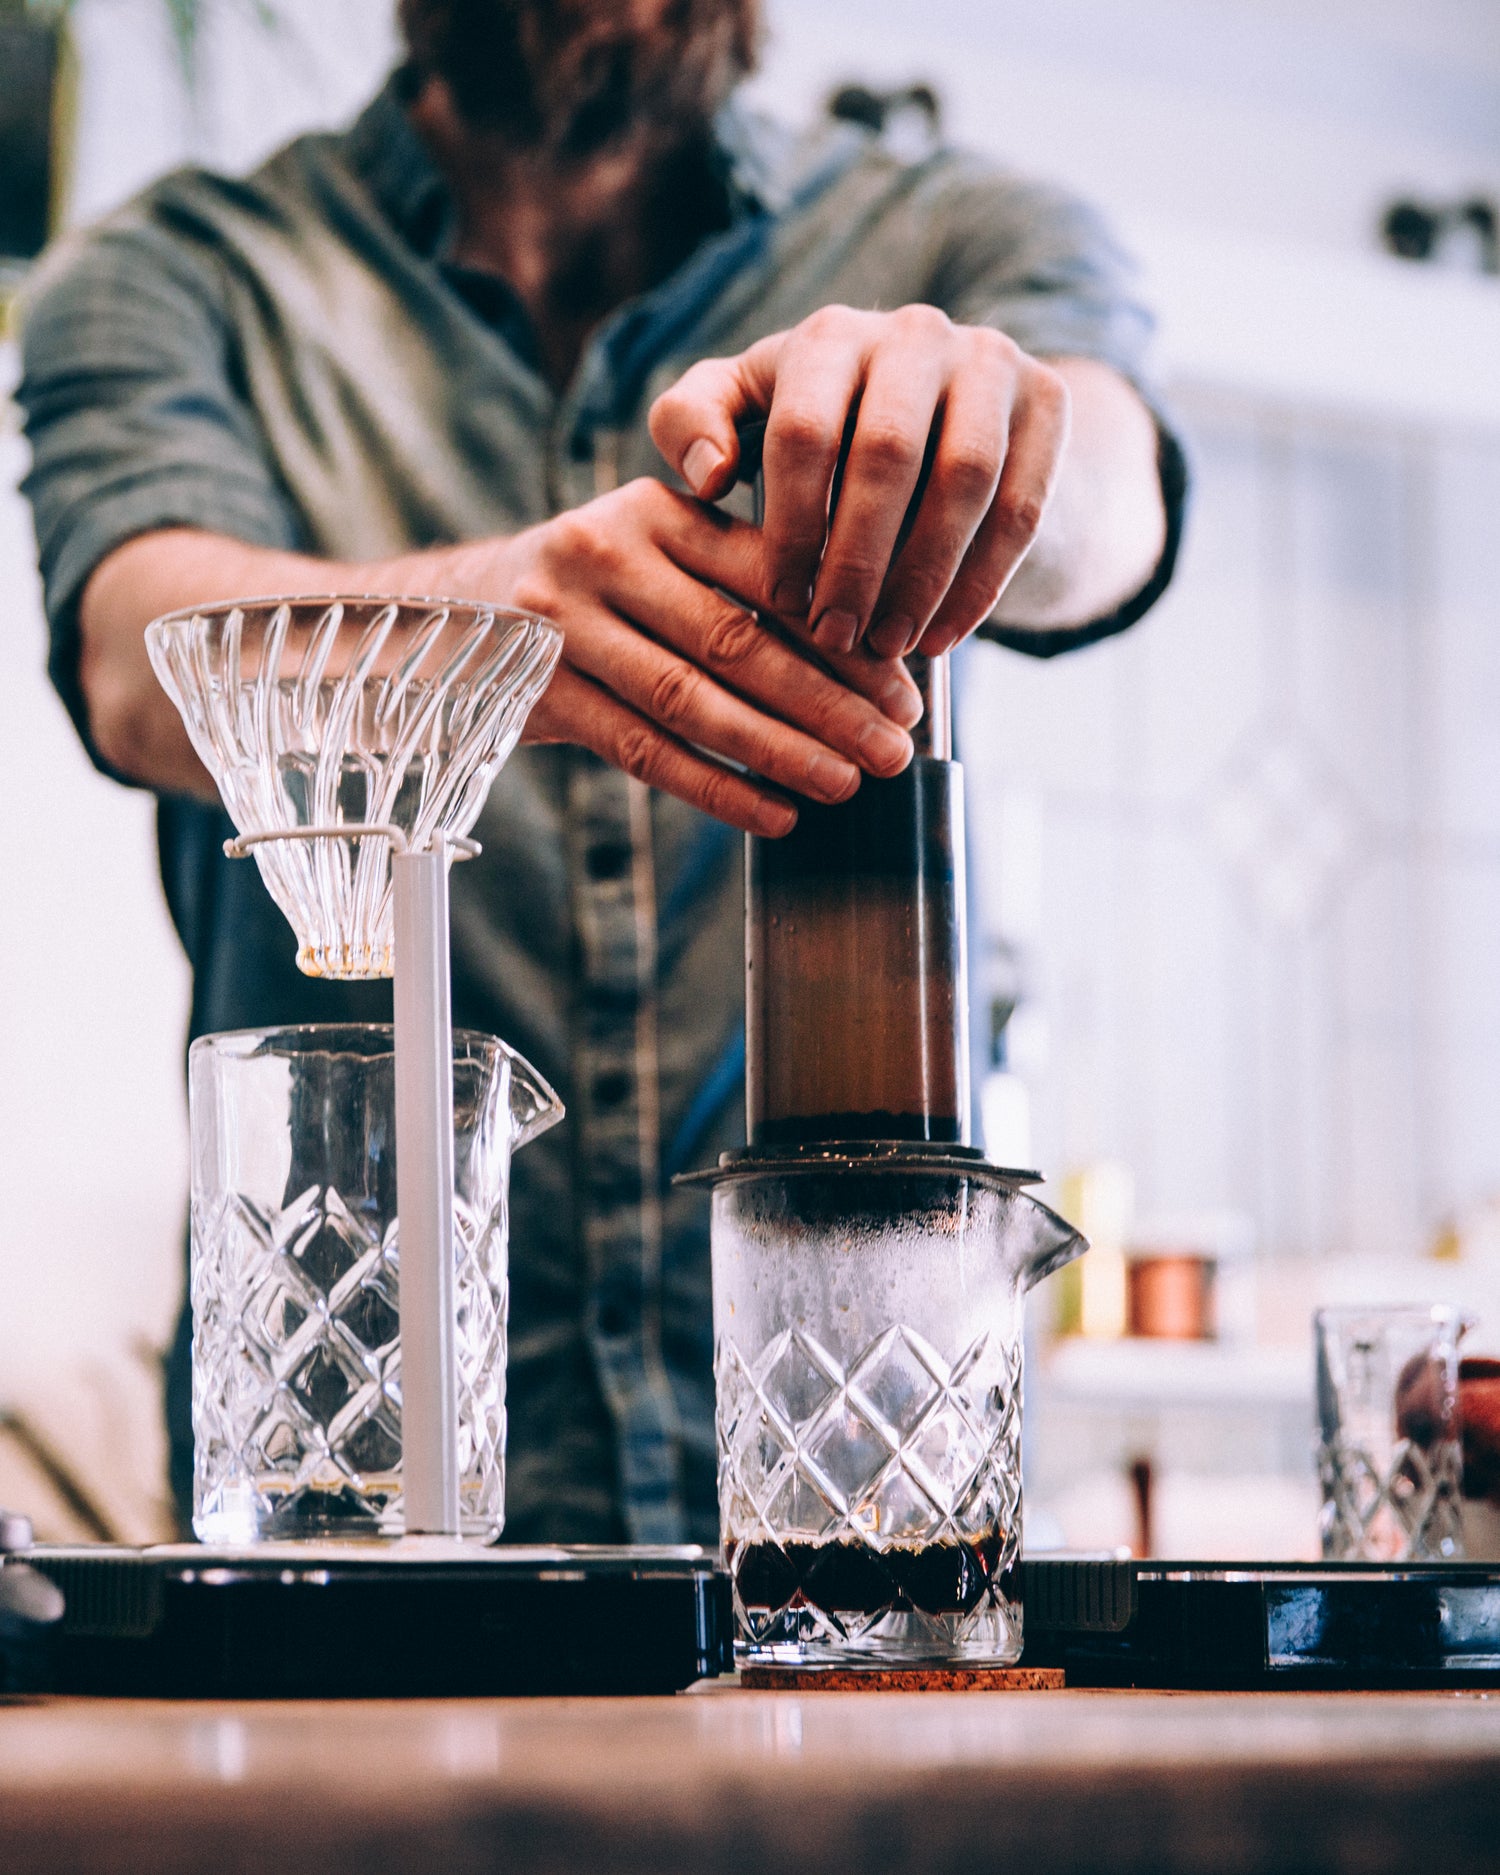
The AeroPress
The AeroPress is a newer more modern method of brewing coffee, producing a medium bodied brew quickly and easily, with low maintenance - ideal for those on the go.
How to use:
- Place a clean dry filter paper in the Aeropress cap and secure it to the body.
- Place the body over your cup, with the cap down.
- Flush the contraption with hot water. This will preheat the vessel and rinse the filter paper. Empty the water from your cup.
- Put your ground coffee in the Aeropress body.
- Pour in water, saturating all the grounds.
- Stir it – quickly! – a couple of times.
- At an angle, carefully insert the plunger. Once it’s in, pull it up slightly to create a vacuum.
- After 90 seconds of steeping, start the plunge. You might have to push a little – watch out for the cup below. The extraction should take around 30 seconds.

The Cafetière
One of the more popular and trusted methods for coffee drinkers, the Cafetiere is easy to use and can produce medium to heavy bodied, fine flavoured filter coffee, even for beginners.
How to use:
- Preheat your cafetière by pouring in some boiling water and giving it a swirl.
- Discard the water, then put in your coffee.
- Pour some just-off boiling water (ideally 92-96 degrees) over the dry coffee and saturate all the grounds but don't fill up yet. Give it a stir first, and then top up with more water.
- Let it steep for four minutes, with the plunger cap on, but not pressed down (that’ll stop the heat escaping).
- Once 4 minutes have passed, carefully plunge at a consistent pace.
- For best results, decant the finished brew to prevent overbrewing.
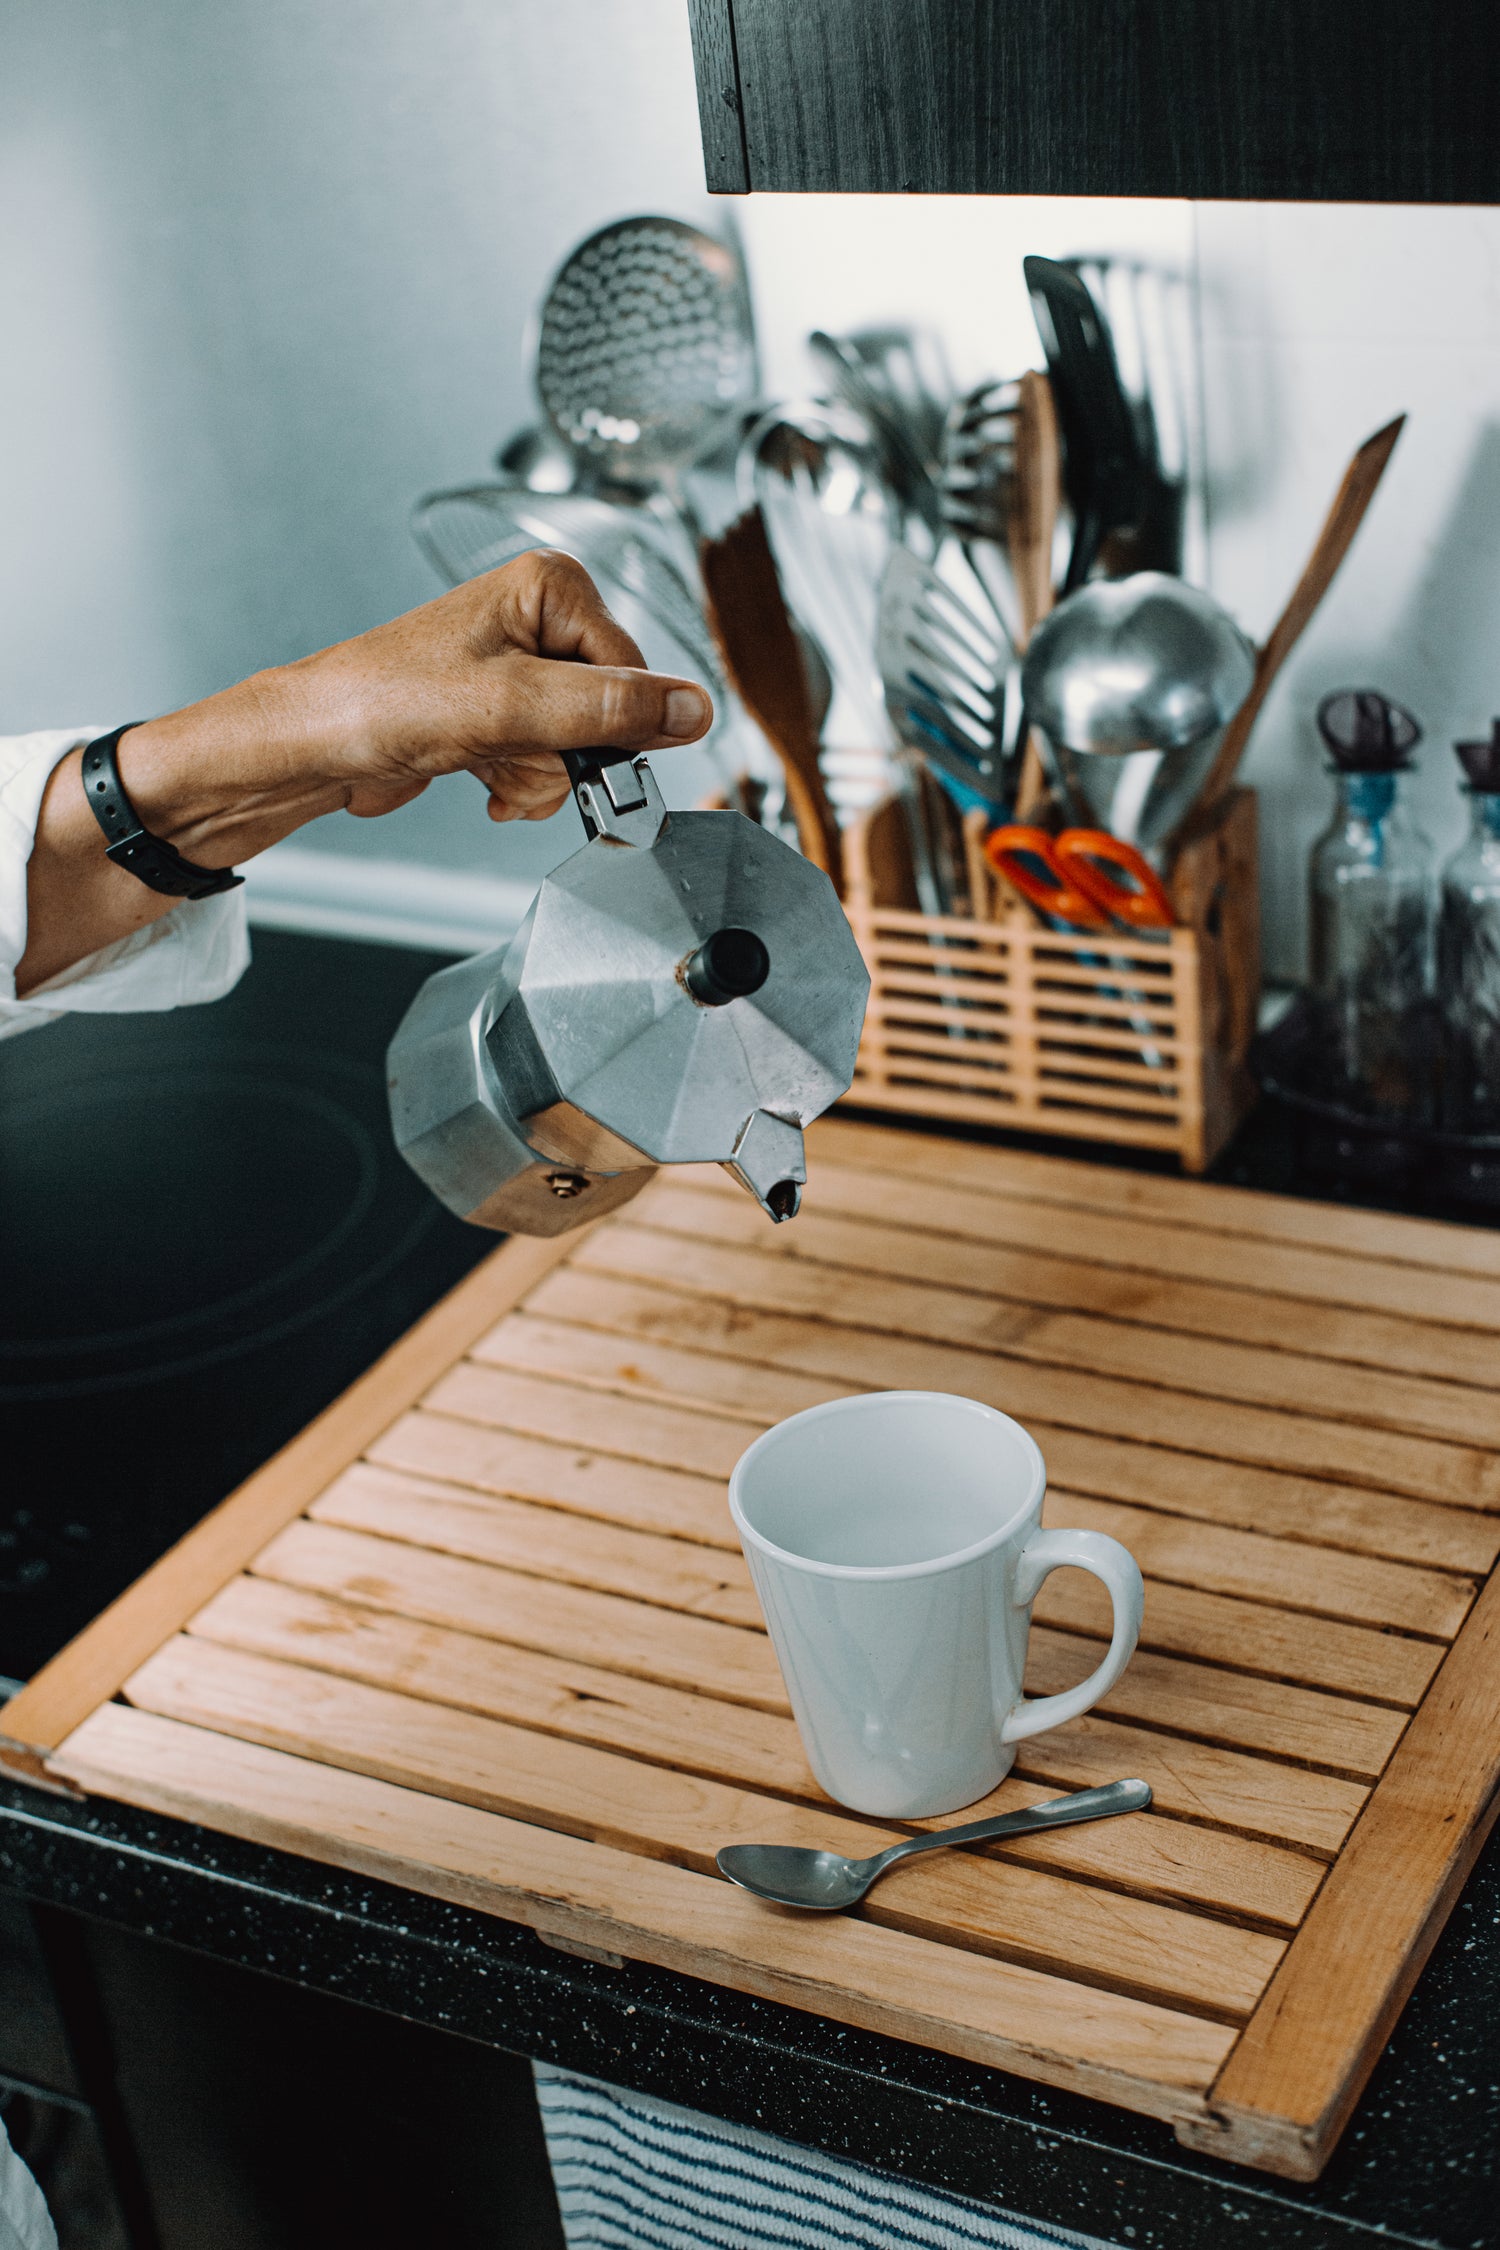
The MOKA Pot
The MOKA Pot is the more traditional option for coffee enthusiasts, by using a stove pot to produce a more intense bodied, espresso brew.
How to use:
- While the kettle’s boiling, grind your coffee. Not too finely!
- Remove the top of the Moka Pot and basket. Fill the bottom with hot water (not cold – increased contact time with water will extract the bitter elements), making sure the level stays below the safety valve.
- Put your ground coffee in the basket and level it out without patting it down.
- Place the basket back in the Moka pot, with the spout down.
- Screw the top onto the bottom. Careful, it’ll be hot.
- Then, put the pot over a low to medium heat.
- When the pot starts gurgling, you’re in luck – your coffee’s good to go. Take it off the heat and serve.
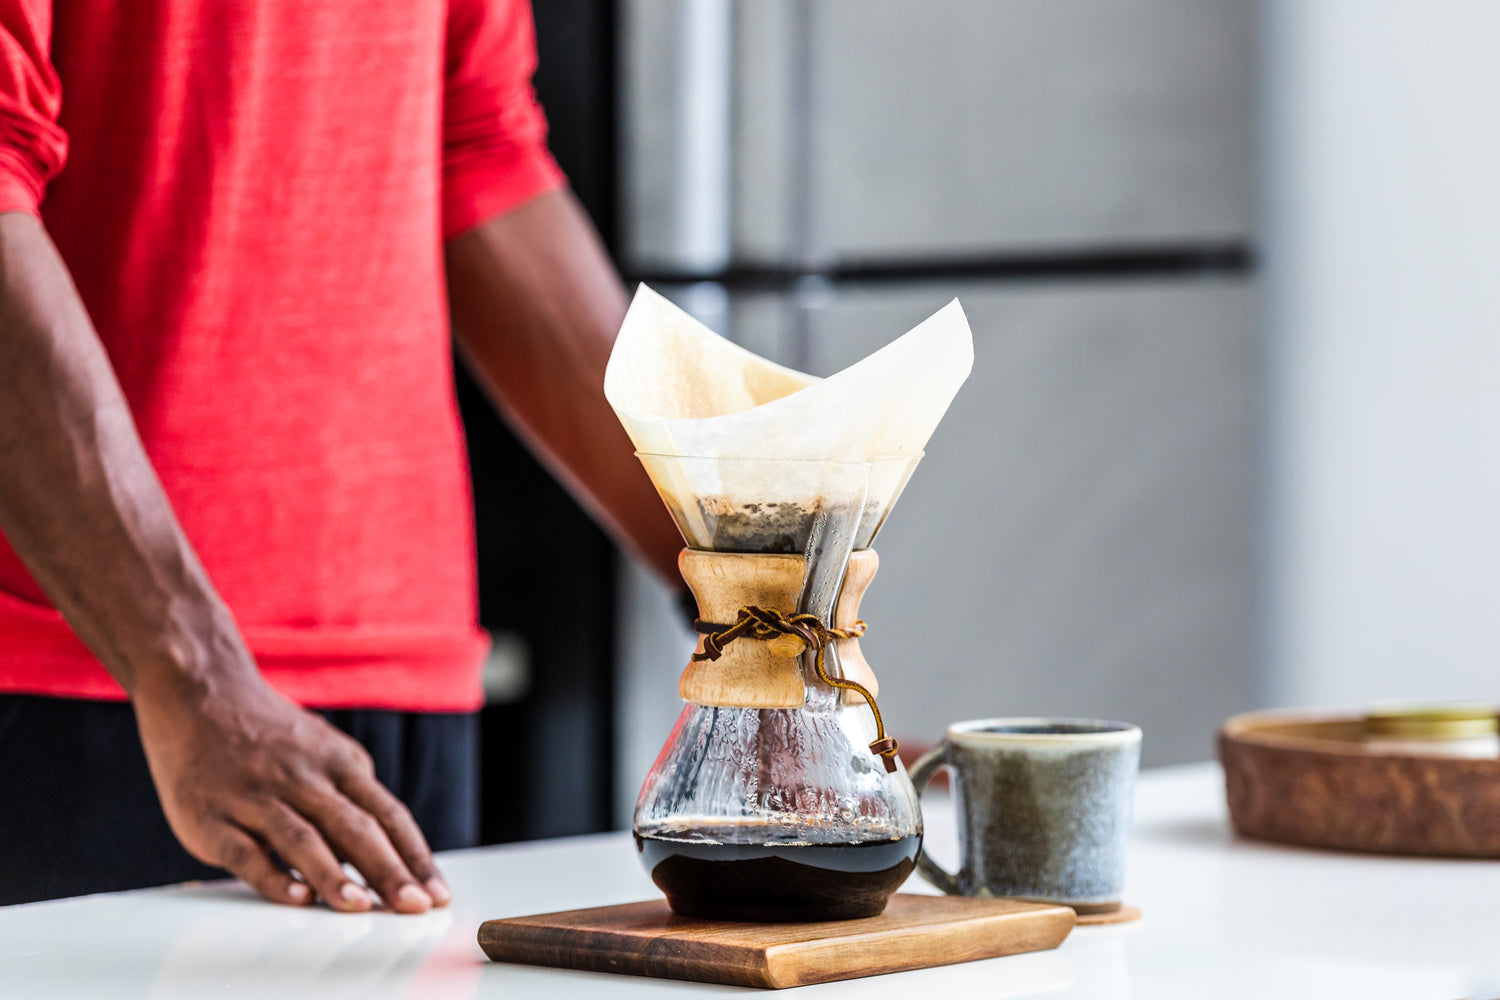
The Chemex
The Chemex is definitely the one for entertaining guests, with its stylish, artisan looks whilst producing, clean light to medium bodied coffee to suit everyone.
How to use:
- Place the tripled layered section of the filter paper on the spout side of the glass jar.
- Give it a rinse through with hot water, then tip away the excess.
- Place your ground coffee in the filter paper. Level it out with a gentle shake.
- Put it all on the scale.
- Start a timer, then pour 50g of water into the grounds, until they’re saturated. Watch them bloom.
- After 30 seconds, pour in 200g more water.
- Then at 90 seconds, add 200g more.
- All your water (450g) should be in by the 90-second mark. Now, let it finish dripping.
- After four minutes, your brew should be good to go.
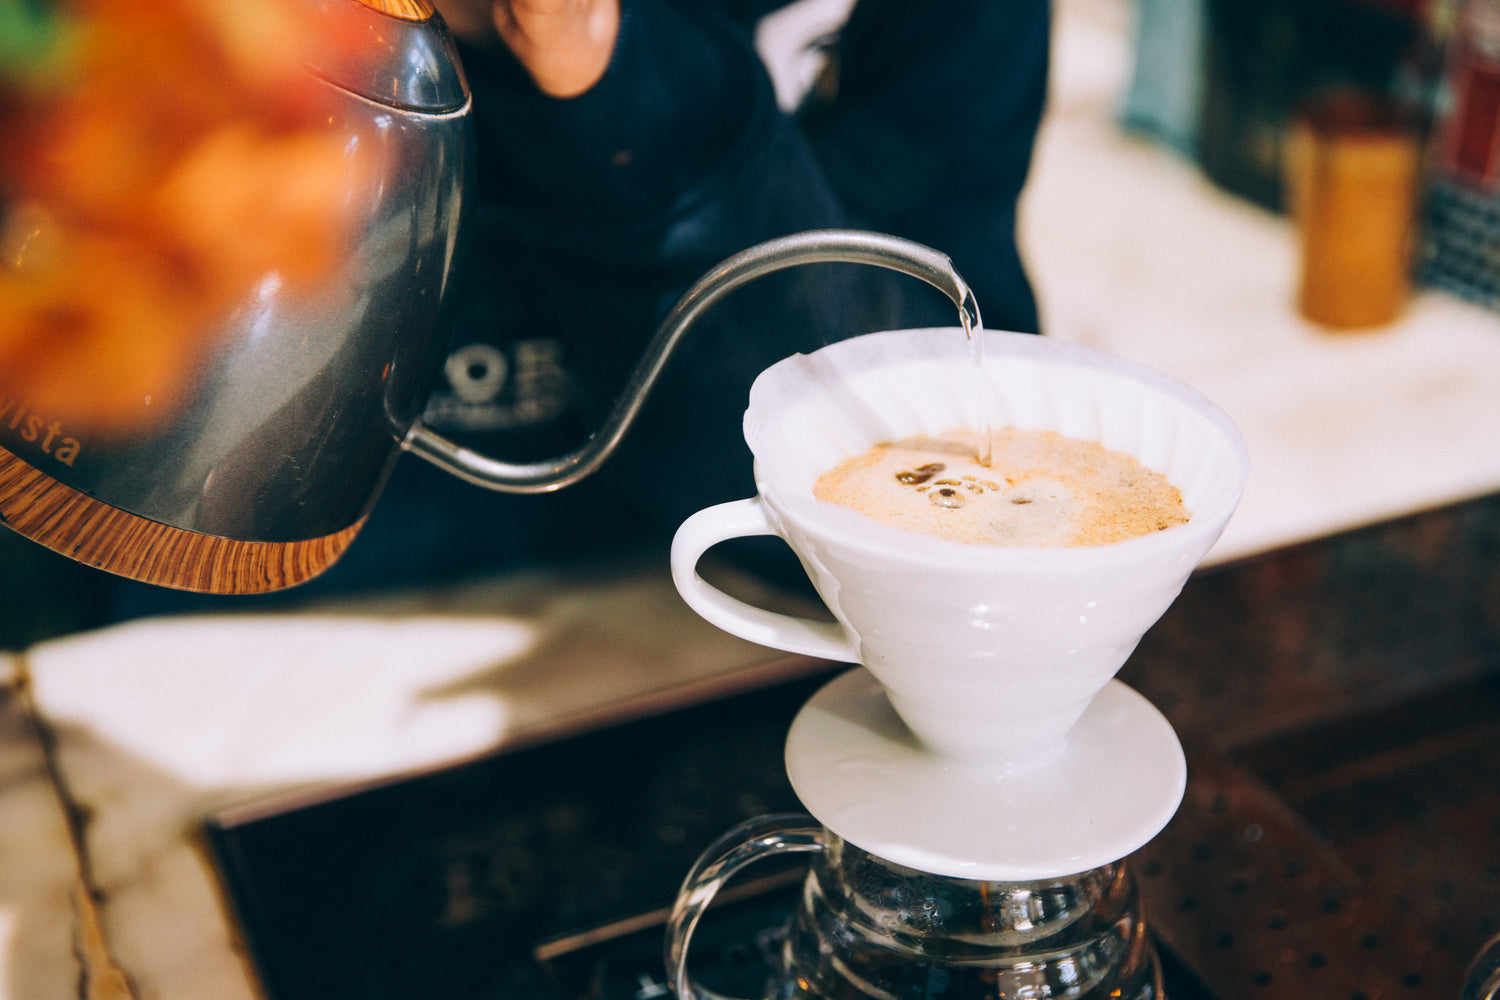
The V60
The V60 is a great way to start brewing in a more sophisticated way to understand more about the world of speciality coffee. Produces a lighter brew with clear delicate flavours
How to use:
- Fold your paper filter along the seam and into a cone. Put the cone in your V60 (which should be sitting on top of a cup or jug).
- Rinse the filter by pouring hot water through it and into the cup (then tip out the excess).
- Place your coffee in the cone and gently shake flat.
- Put your V60 and cup (or jug) on the scale.
- Start the timer. Pour in 50g of water, covering all the coffee, making it bloom.
- After 30 seconds pour in 100g of water. Pour in concentric circles, into the coffee itself (not the sides of the filter paper!).
- After 60 seconds, pour in 50g more water.
- At 90 seconds, add another 50g.
- All your water (250g of it) should be in by the 90-second mark. Now, let it drip until finished.
- Your brew should be done within two to three minutes.
- If it’s taking longer than expected, coarsen the grind next time. If it’s running short, go finer.
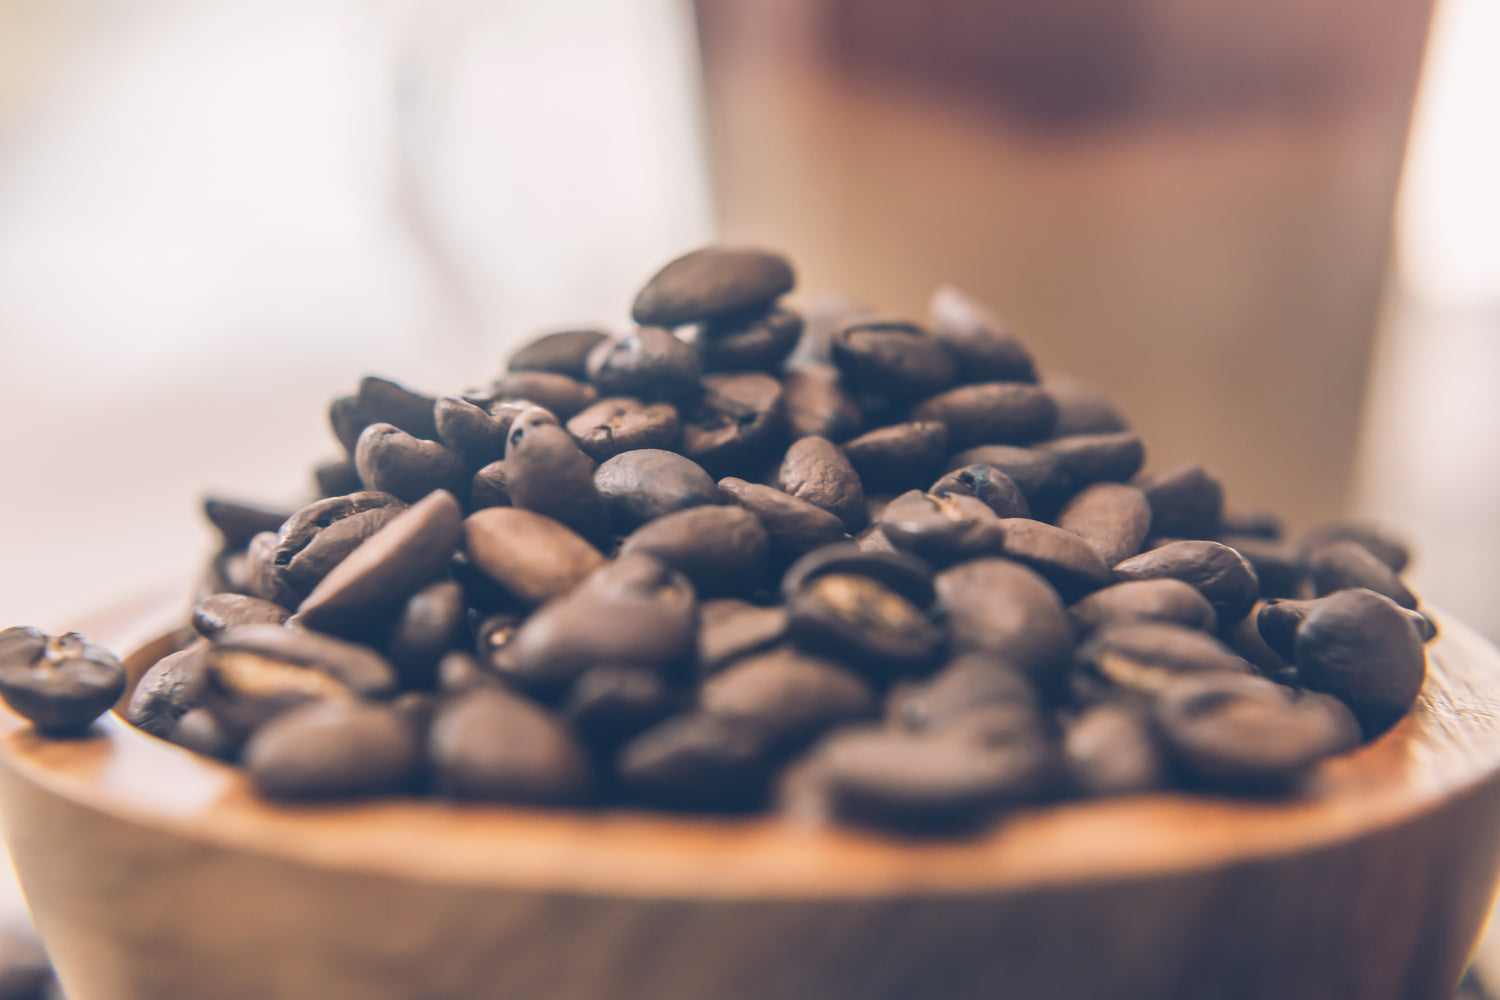
Storing your Coffee
Always a great debate among coffee drinkers, how do you store opened coffee?
If you drink coffee daily, simply keep it in a sealed pack (our bags are fully resealable) and store at room temperature in a dark, dry place such as a cupboard.
Storing in the fridge is not recommended due to the moisture present, and the freezer is only acceptable for long term storage. Always ensure the pack is well sealed and do make sure the coffee is brought back to room temperature before brewing. It will then need to be stored at room temperature - don't re-freeze afterwards.
Ground coffee will always lose its freshness much faster than whole coffee beans so if you find you aren't a regular drinker, consider buying beans and grinding at home as and when you need, or if you don't have a home grinder then the trick is really just to buy just as much as you need!
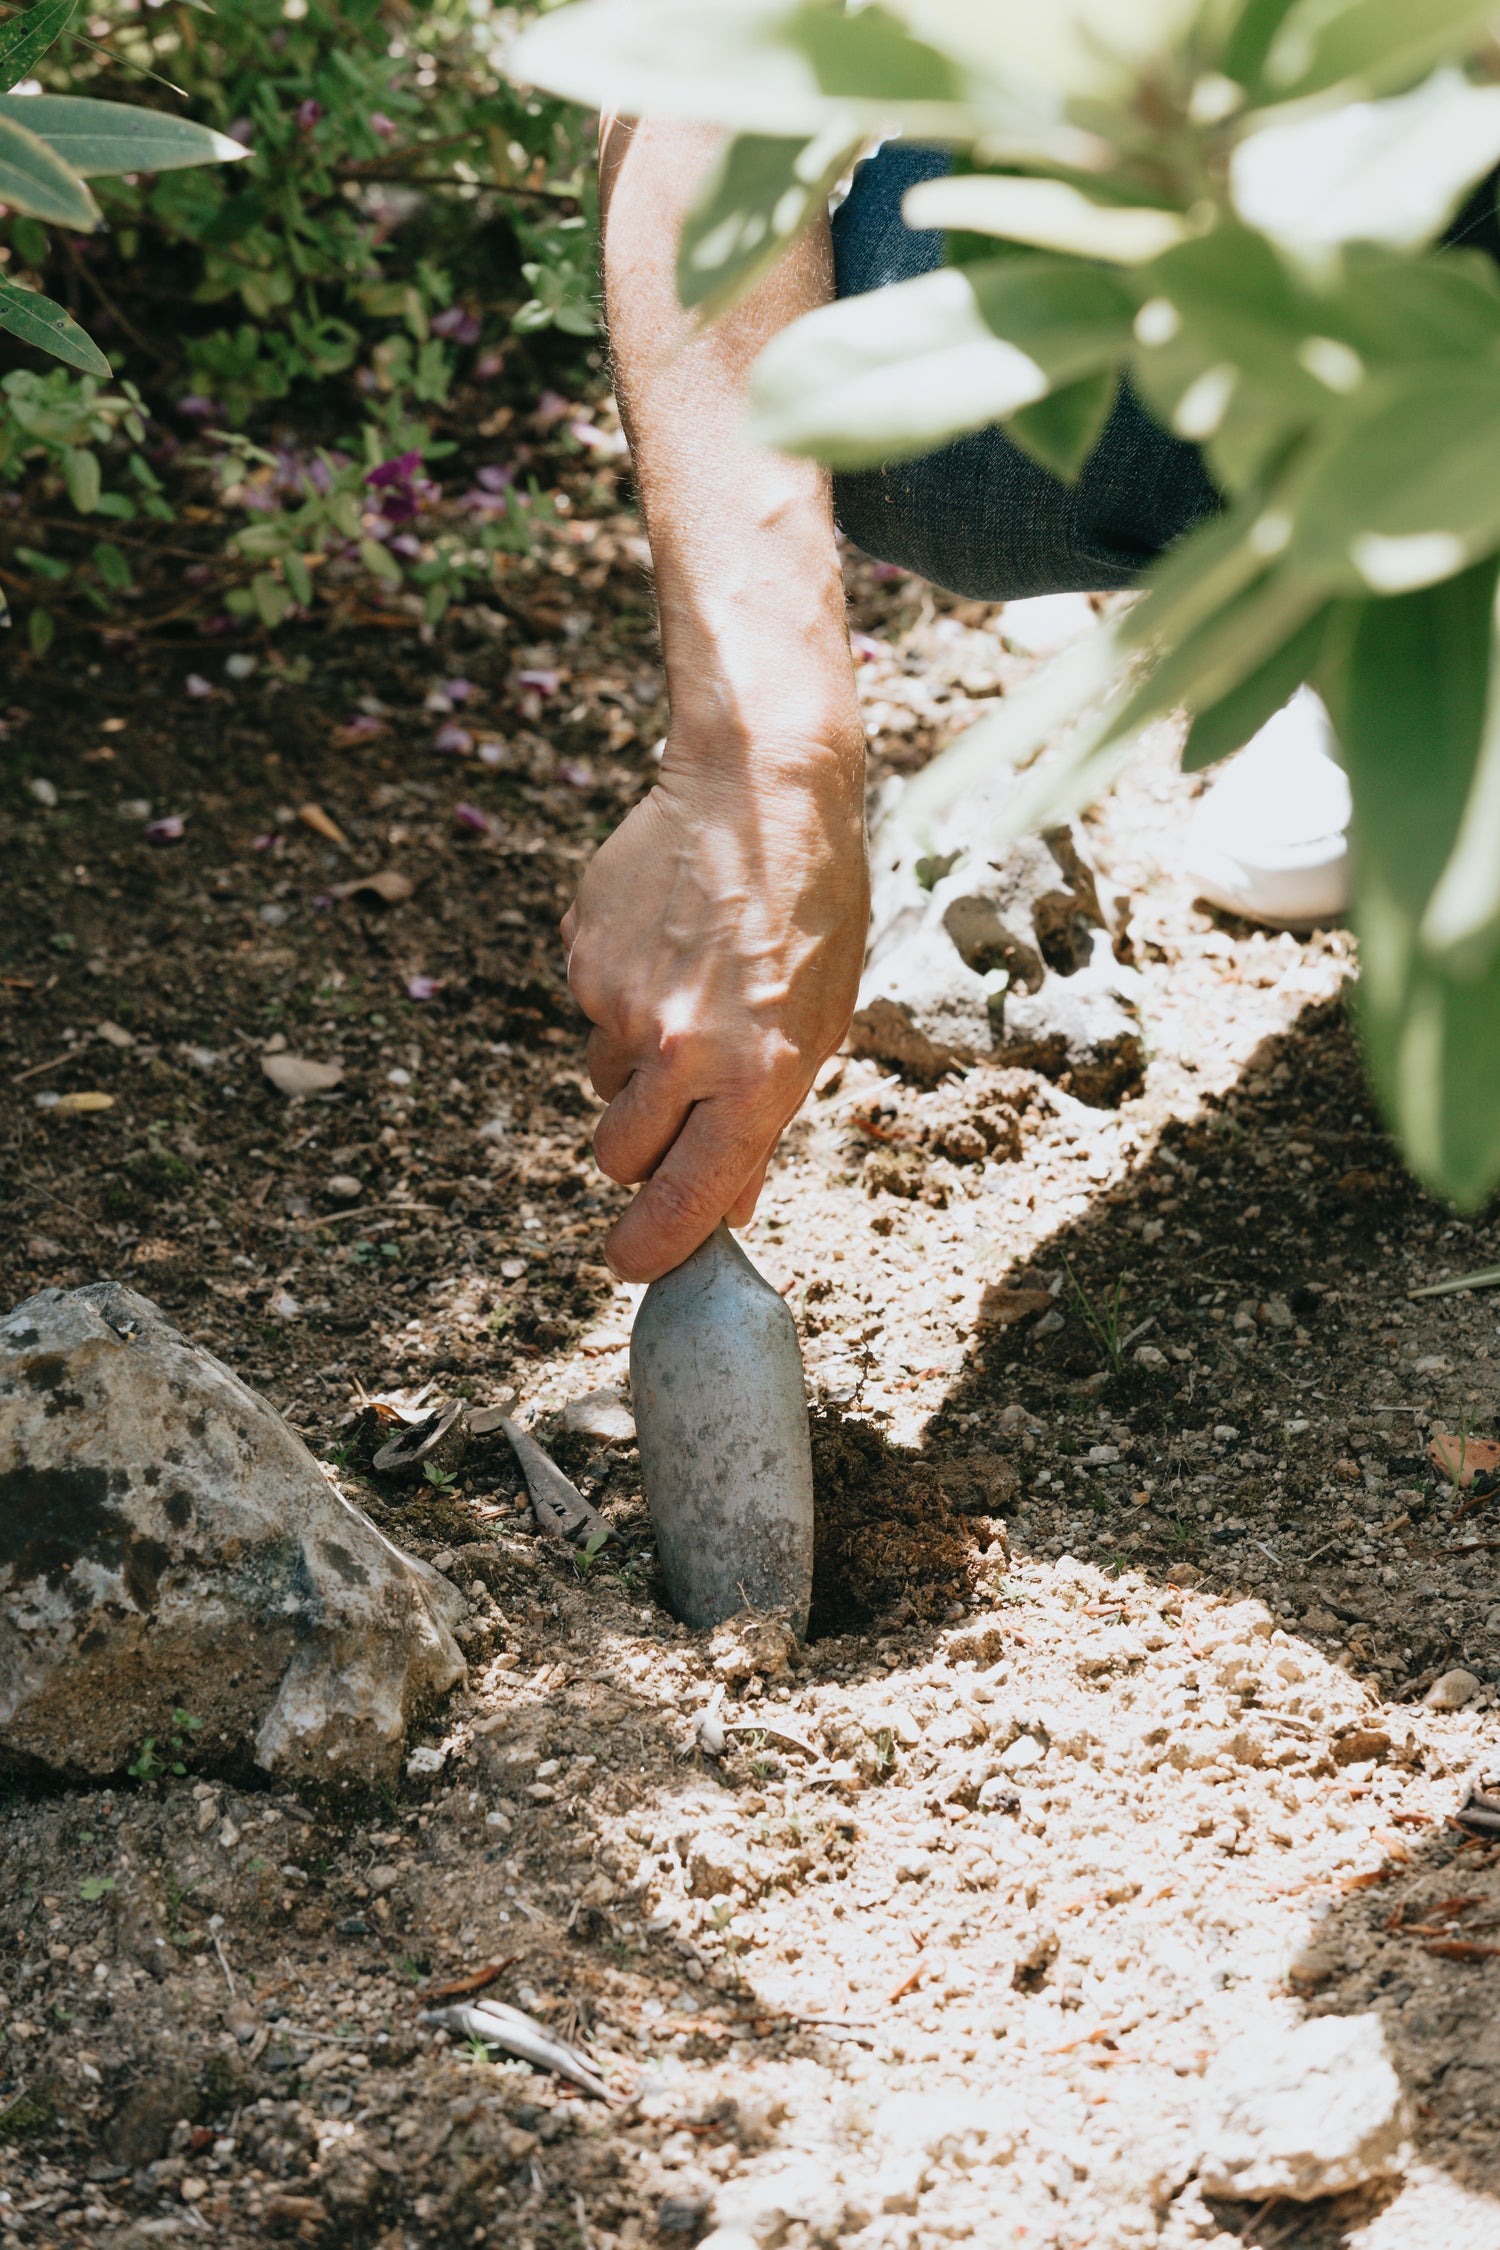
Recycling & Packaging
It came from the earth, why not return it to the earth?
Used coffee grounds are a fantastic fertiliser for around the garden and improving the soil conditions but they can also be placed in your food composting bin.
Our coffee bag packaging is also made from recycled materials where possible given the fresh roasted nature of our coffee and we are always looking into ways to improve this further.